
The AMP Research Power Step system enhances vehicle accessibility with automatic running boards. This guide provides detailed troubleshooting steps to diagnose and resolve common issues, ensuring optimal functionality and safety. By addressing problems like activation delays or LED malfunctions, users can maintain their Power Steps’ performance efficiently.
1.1 Overview of AMP Research Power Step System
The AMP Research Power Step system is a high-quality, automatic running board designed to enhance vehicle accessibility. It features motorized steps that extend and retract seamlessly, providing a convenient and safe entry/exit solution. The system includes a controller, motors, sensors, and wiring, ensuring smooth operation. It also incorporates LED lighting for improved visibility and integrates with vehicle doors for intuitive activation, making it a reliable and durable upgrade for various vehicles.

1.2 Importance of Troubleshooting Guide
A comprehensive troubleshooting guide is essential for diagnosing and resolving issues with the AMP Research Power Step system. It helps users identify common problems, such as activation delays or LED malfunctions, and provides step-by-step solutions. This guide ensures optimal performance, prevents further damage, and extends the system’s lifespan. Regular maintenance and troubleshooting can enhance safety and reliability, ensuring the Power Steps function flawlessly for years to come.
Common Issues with AMP Research Power Steps
Common issues range from mechanical to electrical problems, including power steps not extending, LED lights malfunctioning, and activation delays. Identifying these issues is the first step toward effective troubleshooting.
2.1 Power Step Not Extending or Retracting
If the Power Step fails to extend or retract, check the power source and fuses for interruptions. Inspect wiring connections for security and damage. Test the controller and motor functionality to ensure proper operation. Consult the troubleshooting guide for detailed diagnostic steps to resolve mechanical or electrical faults effectively.
2.2 LED Lights Not Functioning Properly
LED lights may malfunction due to wiring issues or power supply problems. Check connections for security and inspect for damage. Verify fuse integrity and ensure the controller is functioning correctly. Test door activation to confirm proper light operation. If issues persist, consult the wiring diagram to identify potential short or open circuits. Use a multimeter for precise diagnostics and repairs.
2.3 Power Step Activation Issues
Power Step activation issues can arise from faulty door switches, wiring problems, or controller malfunctions. Check the door ajar switch functionality and ensure proper connections. Verify that the controller receives power and signals correctly. Test wiring for shorts or opens using a multimeter. If the issue persists, review the wiring diagram to trace signal paths and ensure all components are functioning as intended.
Essential Tools and Materials for Troubleshooting
A multimeter, wiring diagrams, and basic hand tools are crucial for diagnosing issues. Ensure you have connectors, fuses, and replacement parts readily available for repairs.
3.1 Multimeter for Electrical Diagnostics
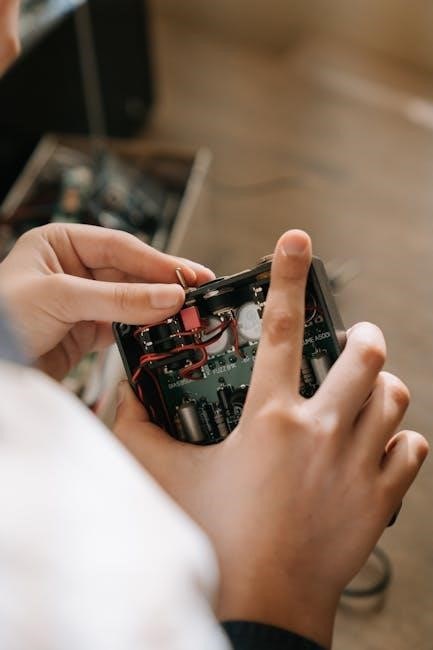
A multimeter is essential for diagnosing electrical issues in the AMP Research Power Step system. Use it to measure voltage, current, and resistance in wiring and components. Test power wires, check for short circuits, and verify diode polarity. This tool helps identify faulty connections, blown fuses, or malfunctioning sensors. Ensure the multimeter is set to the correct voltage range when testing live circuits to avoid damage or inaccurate readings.
3.2 Wiring Diagrams and Manuals
Wiring diagrams and manuals are critical resources for troubleshooting the AMP Research Power Step. They provide detailed schematics of the electrical system, including wire colors, connections, and component locations. Manuals outline step-by-step instructions for diagnostics and repairs, ensuring accurate identification of issues like faulty diodes or reverse polarity. Referencing these materials helps users navigate complex electrical systems and perform effective repairs, minimizing errors and downtime during the troubleshooting process.
3.3 Basic Hand Tools and Connectors
Basic hand tools, such as screwdrivers, wrenches, and pliers, are essential for troubleshooting the AMP Research Power Step. A multimeter is crucial for diagnosing electrical issues. Connectors like butt connectors ensure secure wiring connections. Proper tools prevent system damage and ensure effective repairs. Always use the correct tools to maintain the integrity of the Power Step system during troubleshooting and maintenance procedures.
Step-by-Step Troubleshooting Process
Identify common issues like power failures or wiring faults. Follow a systematic approach to check electrical components, connections, and functionality. Ensure all steps are performed methodically.
4.1 Checking Power Source and Fuses
Begin by inspecting the power source and fuses. Locate the AMP Research controller under the hood, typically connected directly to the battery via a red wire. Check for blown fuses or loose connections. A faulty power supply can prevent the Power Step from functioning. If a fuse is blown, replace it with the correct rating. Ensure all electrical connections are secure to maintain proper operation and avoid future issues.
4.2 Inspecting Wiring Connections
Inspect the wiring harness and connections for damage or corrosion. Ensure all connectors are securely plugged in and not loose. Verify that the wiring diagram matches the actual connections, paying attention to diodes and polarity. Check for short circuits or open circuits using a multimeter. Address any issues promptly to restore functionality. Proper wiring is crucial for the Power Step system to operate smoothly and safely.
4.3 Testing Controller and Motor Functionality
Use a multimeter to test the controller’s power supply and signal output. Check the motor for proper operation by applying direct power. Ensure the motor responds to controller commands without hesitation. Verify that the LED lights activate in sync with the motor. If the motor stalls or the controller fails to send signals, replace the faulty component immediately to restore functionality and ensure safety.
Advanced Troubleshooting Techniques
Advanced methods involve diagnosing complex electrical and mechanical issues, utilizing specialized tools for in-depth analysis and ensuring precise repair of the Power Step system’s functionality and performance.

5.1 Diode and Polarity Checks
Diode and polarity checks are crucial for ensuring proper electrical flow. Use a multimeter to verify diode continuity and correct polarity connections. Reverse polarity can cause motor malfunctions or LED issues. Check all diodes for short circuits or open connections. Ensure the red wire connects directly from the battery to the controller. Faulty diodes or incorrect polarity can prevent the Power Steps from extending or retracting correctly, requiring immediate attention to restore functionality. Always refer to the wiring diagram for accurate connections and test each component systematically to identify and resolve electrical faults efficiently. This step is essential for maintaining the system’s reliability and performance.
5.2 Door Switch and Sensor Calibration
Door switches and sensors play a key role in activating the Power Steps. Calibration ensures accurate detection of door openings. If the steps don’t activate, check the door ajar switch functionality. Verify connections to the controller and ensure sensors are clean. Adjust sensitivity settings if necessary. Proper calibration guarantees smooth operation, preventing activation delays or failures. Consult the wiring diagram for specific procedures and test each door’s activation to confirm correct operation. Regular checks maintain reliable performance and user safety.
5.3 Addressing Delay or Timing Issues
Timing issues, such as delays in step deployment or retraction, can disrupt user experience. Check the controller settings for proper timing configurations. Ensure all doors activate the Power Steps uniformly. A common issue is a 2-second delay before retraction, which can be adjusted via the controller. Verify LED indicators function correctly during operation. Consult the troubleshooting guide for recalibration steps to synchronize timing and restore seamless functionality. Regular checks prevent operational inconsistencies.

Wiring Diagrams and Circuit Testing
Wiring diagrams are essential for diagnosing electrical issues in AMP Power Steps. They provide a clear map of connections and circuits, helping identify faults like short circuits or open connections. Regular circuit testing ensures all components function correctly, preventing malfunctions. Use multimeters to verify voltage and continuity, ensuring reliable operation of motors, LEDs, and sensors.
6.1 Understanding the Controller Wiring
The controller is the brain of the AMP Power Step system, managing all electrical functions. Locate it under the hood, typically near the battery, with a red wire directly connected to the battery’s red terminal. Use the wiring diagram to identify each wire’s purpose, ensuring proper connections to motors, sensors, and LEDs. Trace wiring carefully to avoid misidentification and test connections for continuity and voltage to pinpoint faults efficiently.
6.2 Testing LED Light Circuits
LED lights on AMP Power Steps indicate system status and provide visibility. To test, ensure power is on and doors are open. Use a multimeter to check voltage at LED connectors, referencing wiring diagrams for correct polarity. If lights fail, inspect for blown fuses, loose connections, or damaged LEDs. Replace faulty components and test again to ensure proper illumination and function, addressing any delays or malfunctions promptly for reliable operation.
6.3 Identifying Short Circuits or Open Circuits
To identify short or open circuits in AMP Power Steps, use a multimeter to test voltage and continuity. Inspect wiring for visible damage or corrosion. Check connectors for loose or faulty connections. Test for shorts by measuring resistance between wires and ground. Open circuits can be traced by following the wiring diagram. Addressing these issues promptly prevents further damage and ensures reliable system operation, guided by the troubleshooting manual.
Replacing Faulty Components
Identify faulty components such as the motor, controller, or LED lights and replace them using the troubleshooting guide. Ensure proper installation to restore functionality and performance safely.
7.1 Replacing the Controller
Replacing the controller involves locating it under the hood, connected via a red wire to the battery. Disconnect the battery and remove the wiring harness. Install the new controller, ensuring secure connections. Refer to the wiring diagram for proper polarity and terminal placement. Test the system to confirm the Power Steps operate correctly after replacement. This step restores electronic control, ensuring smooth functionality and safety.
7.2 Replacing the Power Step Motor
Disconnect the battery and locate the motor under the vehicle. Remove the electrical connectors and mechanical linkages attached to the faulty motor. Install the new motor, ensuring proper alignment and secure fastening. Reconnect the electrical connectors and test the system to confirm smooth operation. Refer to the official guide for specific torque specifications and model-specific instructions to ensure correct installation and functionality.
7.3 Replacing LED Light Components
Disconnect the battery to ensure safety. Locate the LED light component, typically near the running board. Remove the faulty LED by releasing its mounting clips or screws. Install the new LED component, ensuring proper alignment and secure fastening. Reconnect the wiring harness and test the LED functionality. Refer to the official guide for model-specific instructions to guarantee correct installation and optimal illumination performance.

Preventative Maintenance Tips
Regularly inspect wiring and connections, clean and lubricate moving parts, and update software or firmware to prevent issues and maintain optimal performance of your AMP Research Power Steps.
8.1 Regular Inspection of Wiring and Connections
Regularly inspect the wiring and connections of your AMP Research Power Steps to ensure proper functionality. Check for signs of wear, corrosion, or damage, especially near the controller, motors, and sensors. Verify that all connections are secure and properly insulated. Use a multimeter to test for continuity and insulation integrity. Addressing wiring issues early prevents malfunctions and ensures reliable operation of your power steps.
8.2 Cleaning and Lubricating Moving Parts
Regularly clean and lubricate the moving parts of your AMP Research Power Steps to ensure smooth operation. Remove dirt and debris from pivot points and hinges. Apply a silicone-based lubricant to all moving components, avoiding heavy oils that attract dust. This maintenance prevents wear and tear, reduces friction, and keeps the power steps functioning reliably. Recheck operation after lubrication to ensure proper movement and alignment.
8.3 Updating Software or Firmware
Regular software or firmware updates are crucial for optimal AMP Research Power Step performance. Check the official AMP Research website for the latest updates. Download the correct firmware version for your system and follow the installation instructions carefully. Avoid using unofficial sources to prevent potential system corruption. After updating, test the Power Steps to ensure proper functionality and address any new issues promptly. Always follow the provided PDF guide for accurate installation steps.
Successful troubleshooting ensures your AMP Research Power Step operates smoothly. Regular checks and updates maintain optimal performance, providing reliable functionality for enhanced vehicle accessibility.
9.1 Summary of Troubleshooting Steps
Troubleshooting the AMP Research Power Step involves systematic checks of electrical components, wiring, and mechanical parts. Start by verifying the power source and fuses, then inspect wiring connections for damage or corrosion. Test the controller and motor functionality, and address activation issues by checking door switches and sensors. Advanced steps include diagnosing LED circuits and ensuring proper diode polarity. Regular maintenance, like cleaning and lubricating moving parts, prevents future issues and ensures reliable operation.
9.2 Final Tips for Optimal Performance

Regularly inspect wiring and connections to prevent corrosion and damage. Clean and lubricate moving parts to maintain smooth operation. Update the system’s software or firmware as needed for enhanced functionality. Address any issues promptly to avoidescalating problems. By following these tips, you can ensure your AMP Research Power Step performs reliably and lasts longer, providing consistent support for vehicle entry and exit.